

Recently, I've been working on a pretty interesting and foolish project I had in mind, and here I'm bringing to all of you my findings. This guide's main aim is to document the process of building an Android kernel, specifically a CyanogenMod kernel and ROM, and modifying the kernel configuration to add special features, in this case, wireless adapter Alfa AWUS036H support, one of the most famous among Null Byters. I want to apologize in advance if this guide will be dispersive, but the point which I'm trying to make is more than just one, and this has multiple scopes and topics in it. Be ready to explore every hidden corner of the Android OS, and its infamous kernel!
Link of Kernel Source for LeMax 2 is here
Why I Was Interested in Android Kernel Building
When I first bought my LeMax 2, I was sure it was going to support native monitor mode directly on its internal wireless card. However, as soon as I started looking around to make this happen, I found out that the chipset doesn't support monitor mode yet, and probably never will, because it is a powerful device running on Qualcomm Snapdragon 820 processor..But a few months ago, my hunger of knowledge brought me back going mad and yelling in front of a computer. Winter was not much cold this past year. I spent the last few months trying to get monitor mode to work on my LeMax 2. However, I can't deny that the way to success wasn't easy, mostly because of lack of documentation as always, so here I am, breaking down the steps I've been following in order to make this work.
The Choice
Before proceeding, I must inform you that I've been trying to follow other paths before recompiling the entire kernel, even though, unfortunately, none of them worked for my device (but might for yours).
The most straightforward way to do this is by having a device with a wireless card that has a chipset known to support monitor mode. If these requirements are satisfied, your device is probably supported by the application bcmon, which is aimed to set your built-in wireless card into monitor mode.
However, bcmon's development is discontinued, so you may have some troubles with that. Remember that most of these projects need root access.
Another option is to use Kismet's application Android PCAP which "implements the Linux kernel RTL8187 driver in userspace using the Android USB host API. This means it doesn't require root privileges (a highly dangerous requirement), and will run on stock phone firmware."
First of all, rooting is not that dangerous. It is almost impossible to brick an Android device today, and even if you do, if you have a backup and a computer, you can basically pick up your stuff where you left it. Flashing ROMs is even more risky, but you can recover from that too very easily nowadays.
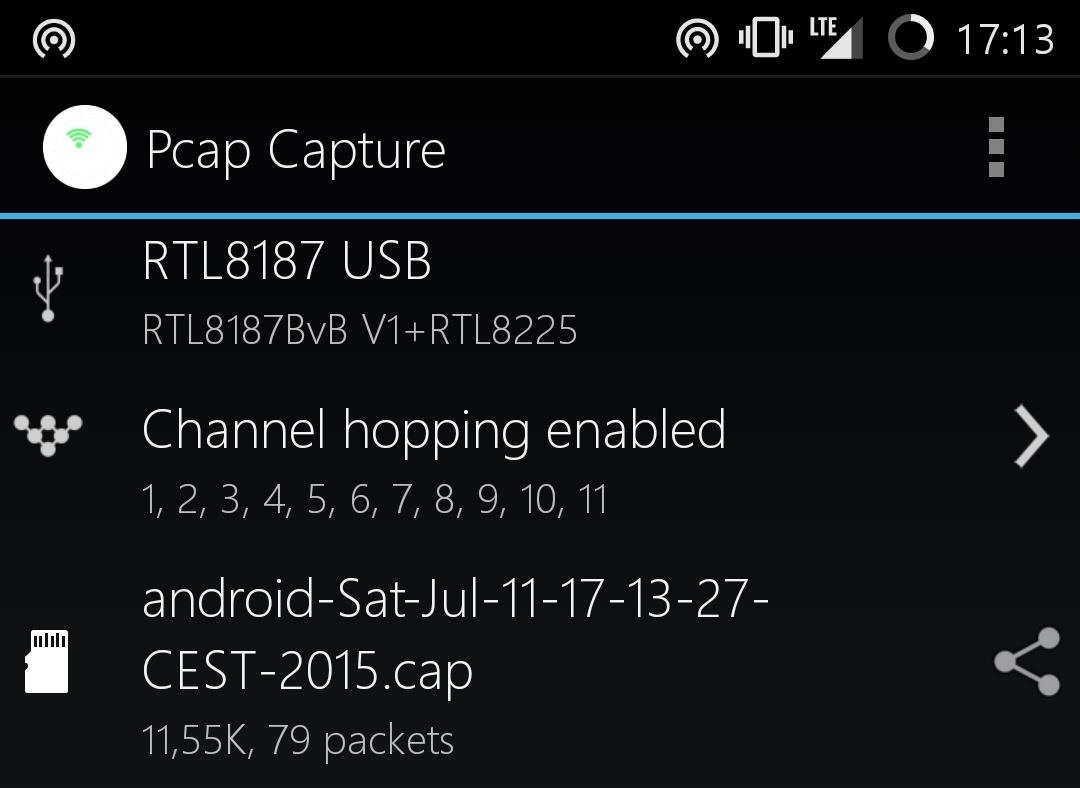
Second, this application does in fact put the Alfa adapter in monitor mode, but is limited to the environment set up by the application itself (capturing PCAPs to analyze later with Wireshark), so no Airodump-ng nor wardriving. (Kismet, you had one job! Anyway, remember this, Kismet, we'll talk about it later).
Finally, the last option was trying to load kernel modules, but this is out of the scope of this guide because Realtek drivers source code for RTL8187L, AWUS036H chipset is too outdated thus incompatible with most of recent Linux kernels, Android included.
The only option left was to recompile the Android kernel with built-in support for Realtek's specific drivers, which were patched and built into most Linux distributions over the years, thus available to the compilers we are going to use.
Journey & Goals: Compile an Android Kernel!
Before starting: I like my posts to be full of references and links that guided me through my findings, however, nothing fundamental will be excluded from this guide, even though I will have to assume that you are comfortable with the concepts of Linux, kernel, Android, SDK, ROM flashing, source code, and open source.
Kernel is the soul of "stuff," it is the link between hardware and software, just like body and thoughts, matter and imagination; it is the fragile line between what something is and what something feels like. When you scroll down a page very fast on your smartphone, and it actually feels like you are reading a book, at the end it is all just memory being updated with a time lag of milliseconds! ADB's "logcat" is maybe the best way to show what an Android kernel does and how hard it works (or dmesg on Linux, if you want, but we'll get to it later).
Kernel is the soul of "stuff," it is the link between hardware and software, just like body and thoughts, matter and imagination; it is the fragile line between what something is and what something feels like. When you scroll down a page very fast on your smartphone, and it actually feels like you are reading a book, at the end it is all just memory being updated with a time lag of milliseconds! ADB's "logcat" is maybe the best way to show what an Android kernel does and how hard it works (or dmesg on Linux, if you want, but we'll get to it later).
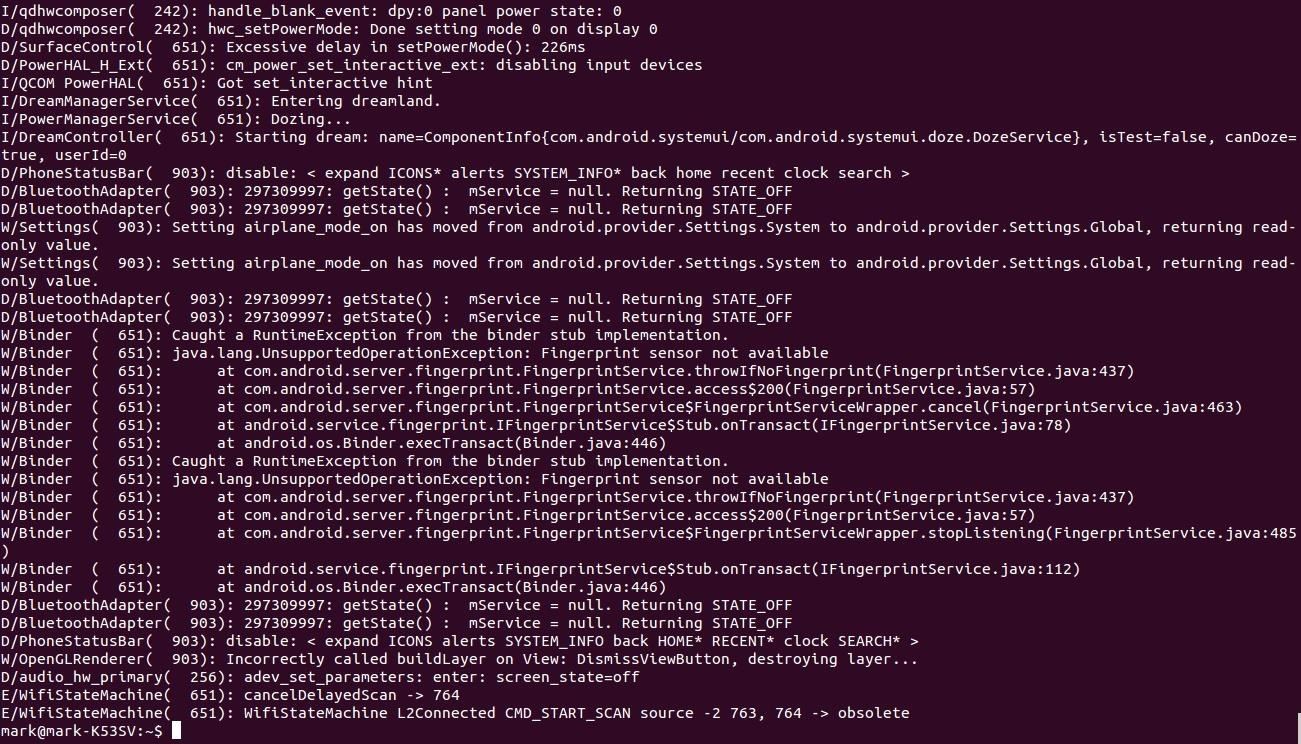
Part of the output generated by pressing the power button to lock the screen. Every action generates at least ten lines of code, and who know what lies beyond.
For a third-party device to work on any device, computer or smartphone doesn't matter, the device must know how to interact with it. Drivers are somehow "rules" that set up a proper language trough which the devices can communicate.
What we are about to do is recompile the Android Lineage OS kernel with support for the drivers we want to be built in. In this case, I will be building AWUS036H (RTL8187) drivers support for a Samsung Galaxy S5 G900F (KTLE), however, this guide's main goal is to inform you about Android kernel building.
What & Why Lineage OS ?
Even though this entire process can be reproduced using any other source code, using Lineage OS is probably the most straightforward way.
But first of all, what is Lineage OS exactly? It is an open project still in development which aims to bring Android into open source. In other words: a modified, more customizable, open-source version of Android OS.
But first of all, what is Lineage OS exactly? It is an open project still in development which aims to bring Android into open source. In other words: a modified, more customizable, open-source version of Android OS.

Even though there is stock firmware source code available for some vendors, these builds may be missing some dependencies (this is exactly what pushed me on Lineage OS), so I recommend you to stick with a completely open-source project. There isn't only Lineage OS, but it is probably the most famous and documented, that's why I'm choosing this among others.
Illustrating what a ROM really is is out of the scope of this guide too, so before continuing, I advise you to look around on the internet and make yourself used to the concept of custom ROMs and kernel flashing.
Illustrating what a ROM really is is out of the scope of this guide too, so before continuing, I advise you to look around on the internet and make yourself used to the concept of custom ROMs and kernel flashing.
How to Install Lineage OS on Your Device
Before actually getting your hands dirty, you may want to try and install the Lineage OS ROM on your device.
Warning: this process should NOT be taken superficially. If you have never heard about rooting, this is NOT for you. I would tell you that this is not for the faint-hearted either, but once you get used to it, you will even know how to resurrect bricked phones. Any of this might brick your phone. Although it's almost impossible to brick it definitely, if you faint during this process, it's not my fault. I warned you.
By "flashing" a version of Lineage OS to your smartphone, you write the ROM in memory in place of the existing one. Generally, Android devices are composed of several partitions (boot, system, recovery—each of these has its own partition in memory), which can be overwritten separately, however, choosing to flash a ROM will usually comprehend all the partitions except the recovery one, which is left for the purpose of installing custom recovery.
There are several ways you can flash a ROM onto your Android device, but today I will briefly go through a few of them. Even though this is not the main scope of this guide, we'll need this for later, as you must be able to install the ROM we will get at the end of the process.
In both cases, you'll have to first download the Lineage OS ROM from the official download page. At the time of writing, the most advanced version is 12.1, which is based on Lollipop Android 5.1.1. Select your specific device code on the left (you can look the codename up on Google (e.g., Samsung Galaxy S5 is "KLTE"), usually shown also on the Lineage Os Supported Device List
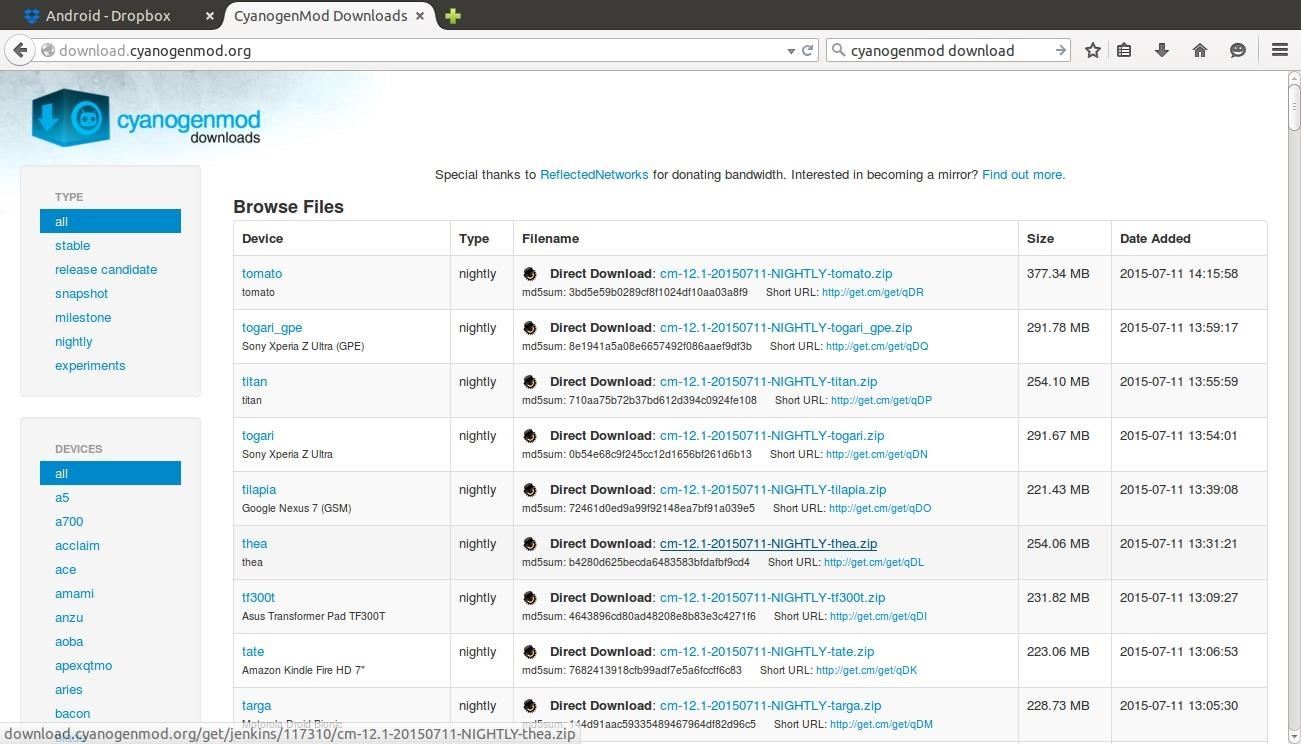
Here you may find different versions called either "nightly" or "milestone," which mean "bleeding edge update" or "tested and recommended." I don't know if there's any 12.1 milestone anywhere, but there should be no problem with nightlies either, so go ahead and download one of the latest for your devices. You should get a .zip file.
Here there are two ways to flash a ROM on your device, but first you must know that if you flash Lineage OS over an Android device which was previously using stock firmware or any other different firmware, including older versions of Lineage OS, there might be some incompatibilities and wiping data is recommended. You can avoid this step only if you are sure there will be no incompatibilities or if you are flashing Lineage OS over another Lineage OS firmware of the same version. For example, if you are later going to build Lineage OS 12.1 (which is what we are going to do) and you have Lineage OS 12.1 already installed, you can just re-flash the ROM without wiping any data.
Here there are two ways to flash a ROM on your device, but first you must know that if you flash Lineage OS over an Android device which was previously using stock firmware or any other different firmware, including older versions of Lineage OS, there might be some incompatibilities and wiping data is recommended. You can avoid this step only if you are sure there will be no incompatibilities or if you are flashing Lineage OS over another Lineage OS firmware of the same version. For example, if you are later going to build Lineage OS 12.1 (which is what we are going to do) and you have Lineage OS 12.1 already installed, you can just re-flash the ROM without wiping any data.
- By using the tool "Odin" for Windows for Samsung devices only. There's also Heimdall Suite as an available tool, which is cross-platform thus available in the Linux repositories.
- By installing a custom recovery (you can do this via Odin, too) and then loading the .zip of Lineage OS on the internal (or external) SD card of your device, backing up everything (Step 2 of the guide), wiping existing data (Step 5), and flashing the .zip (Step 4).
In case you are having some troubles, try following the guides from the CyanogenMod Wiki.
Make sure you also back up everything on Google's servers, personal information included!
In-depth explanation of these steps is out of the scopes of this guide. I hope I provided you enough references to get your way through.
Make sure you also back up everything on Google's servers, personal information included!
In-depth explanation of these steps is out of the scopes of this guide. I hope I provided you enough references to get your way through.
Requirements for Building the Lineage OS Kernel
To successfully complete this troublesome process, you must meet some specific requirements:
Capabilities
Capabilities
- You should at least be aware of the specific Android development language. If you know what rooting, flashing, ADB, and Android SDK mean, you should be good to go.
- Linux should be a close friend of yours. Even though each step will be explained, this still relies on Linux skills—you must know what you are doing. In particular, make sure you know very good the "make" utility and how C files are compiled.
Requirements to Match
- An Android device supported by Lineage OS. Look if your is here.
- Your device should already have a version of the Lineage OS ROM installed, the same version we are going to build our kernel for. More later. Although this is optional, it's best if you do this.
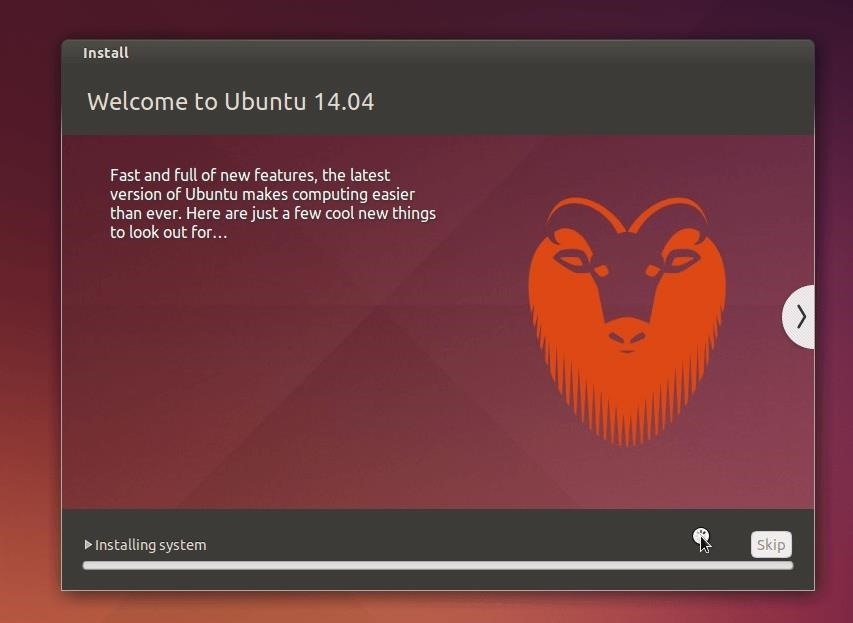
- You should have the latest version of Ubuntu running, either dual-boot, live, or virtual machine, since most of the tools are available in the Ubuntu repositories and are aimed at Ubuntu. Hey, you are going to build a kernel, if you can't achieve this you are in trouble. Best if you use 64 bits!
- Make sure that your environment has more than 50 GB of storage, the more, the better. Source code takes up to more than 20 GB. I'm serious.
- Also make sure your internet connection is stable and reliable (and fast).
- USB cable compatible with the device you are going to build for.
- OTG cable if, like me, you are going to connect a wireless adapter to your device.
Now, take some coffee and start listening to some
good music, because it is going to take quite some time.
good music, because it is going to take quite some time.
Setting Up the Environment
Let's start by downloading some fundamental packets and configuring a few things on our system.1. Install the Android SDK
This contains the two tools ADB and Fastboot. You can download it from here and then install it or just download ADB and Fastboot with:
sudo apt-get install android-tools-adb android-tools-fastboot
2. Install These Packages
Install all of these packages, regardless if you have 32 or 64 bit:
sudo apt-get install bison build-essential curl flex git gnupg gperf libesd0-dev liblz4-tool libncurses5-dev libsdl1.2-dev libwxgtk2.8-dev libxml2 libxml2-utils lzop pngcrush schedtool squashfs-tools xsltproc zip zlib1g-dev
There are some problems with the Java packages. Ubuntu 14.04, the version I was using and that I recommend, is equipped with Java 7 by default, but it gave me some errors. So you should either:
- Download Java 6 (recommended):
- Download Java 7 (I used this one, no problems):
Then, set your default version to the latest installed:
sudo update-alternatives --config java
sudo update-alternatives --config javac
In both, choose one "manual mode," the one you just installed.
3. For 64-bit Systems
sudo apt-get install g++-multilib gcc-multilib lib32ncurses5-dev lib32readline-gplv2-dev lib32z1-dev
4. Create These Directories
For simplicity's sake, make sure you are in the home folder and create the following directories:
mkdir -p ~/bin
mkdir -p ~/android/system
Get the Source Code
After
setting up everything correctly, it's time to download the Lineage OS
source code so that when we get to compile, we can choose to compile the
entire system, graphics, and default applications. The source code will
be very big and we need an effective way to keep it always clean,
fresh, and up to date, as therein will be all the dependencies,
services, applications, and scripts that will be needed to compile the
entire ROM. To do this, we are going to use the "Repo"
utility, which is an automated tool for GitHub cloning that has a lot
of interesting functionalities. To get the Repo script, we need to
"curl" it from Google's APIs and give it permissions:
curl https ://storage.googleapis.com/git-repo-downloads/repo > ~/bin/repo
chmod a+x ~/bin/repo
chmod a+x ~/bin/repo
At
this point, we are going to initialize the GitHub repository we want to
clone, specifying the branch. The Repo utility is very useful when
talking about kernels or firmwares because who hosts the code organizes
the different versions in branches, so it's easier to keep up with it.
Here we are going to specify the repository with -u and the branch with -b. I'm going to download the 12.1 Lineage OS source code as it is the latest available and the same installed on my Android.
cd ~/android/system/
~/bin/repo init -u https: //github.com/CyanogenMod/android.git -b cm-12.1
~/bin/repo init -u https: //github.com/CyanogenMod/android.git -b cm-12.1
This will now initialize the repository in the specified folder.
Even
though 12.1 is still on the bleeding edge, for some devices it is the
only available in the download page. For example, a Samsung Galaxy S5
(the one I'm going to build), also known as "G900F" or "KLTE"
(codename). As you know, GitHub is organized in branches. If you check
the branches for CyanogenMod/Android, you will notice that there's also
the 12.0, 11, and 10 versions. This means that even though there's no
download for older versions, you may compile them manually. To download
older ones, just switch to "-b cm-12.0" in the repo init command.
Now, to start downloading the source code:
~/bin/repo sync -c -f -j8
Where:
- -c means current. Download only current version instead of all history.
- -f means force. Continue if there's some connection error.
- -j8 specifies the number of parallel operations. The higher, the faster, but make sure your processor can handle it. For an octa-core, -j16 is fine. To find out the number of processors you have, run nproc.
A very
heavy download will start. Around 20 GB of Android source code are now
being downloaded to your computer. Make sure you have no traffic limits.
Try to stop the process as less as possible. Anyway, Ctrl+C
will stop it. To resume from where it left, run the repo sync command
again. If everything went fine, you should have a tree directory under ~/android/system
similar to the picture below. Anytime you want to get the latest source
code available, you can just re-run the repo sync command. CyanogenMod
team is actively developing for fixing bugs, so be sure to report them
if you find any.
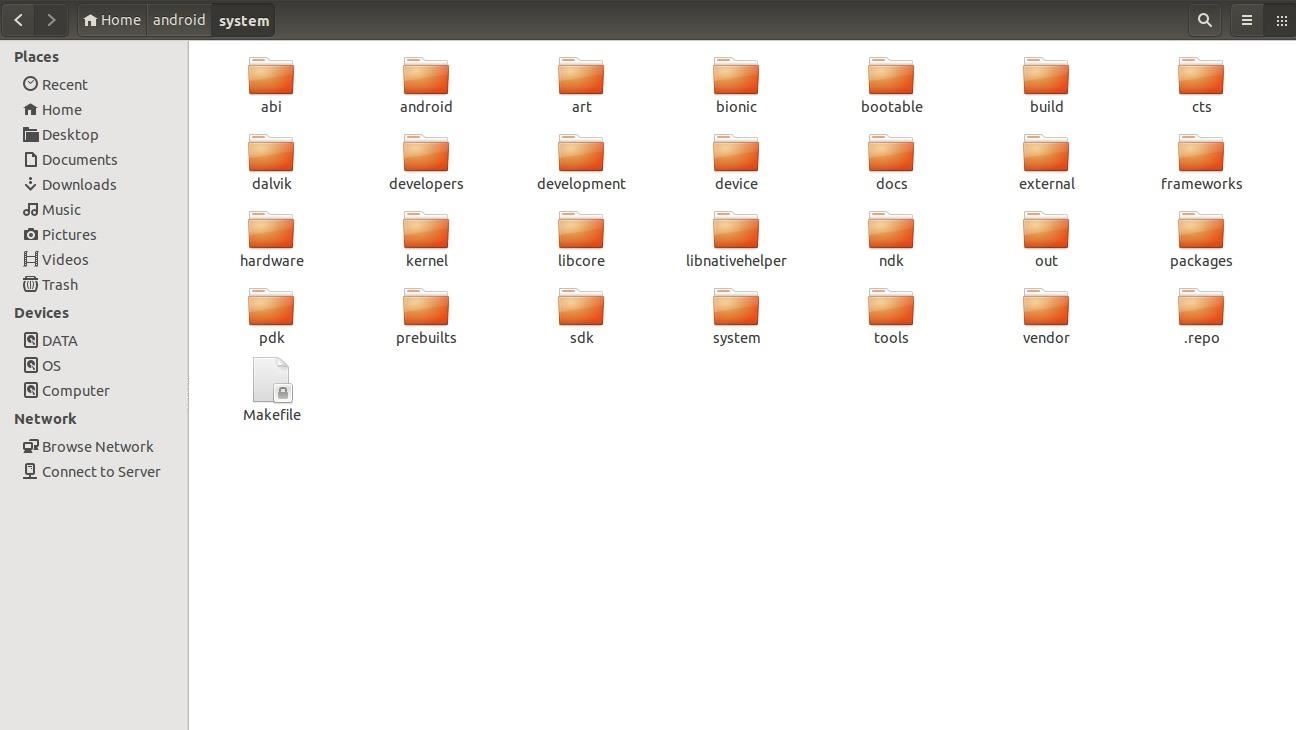
The download can take many hours. There's nothing you can do
about it. To watch the progress of the syncing, look at the properties
of the folder "system." When it will get around 20 GB, it means that the
download is almost done.
If
you have already downloaded another Lineage OS branch or Android
kernel and firmware in general, a lot of files and dependencies are
going to be exactly the same. If you are in this situation, you can
speed up the download by appending the argument --reference=/PATH/TO/OTHER/SOURCE to the repo init command.
If
you make some changes to the source code and want to check the
differences between the original source tree and the current one, use repo status. More repo tips and tricks at XDA-University.
In
case you need the source code for any other device, although I'm not
going to talk about them throughout the guide, here it is where you can
find it for Samsung, HTC, and Nexus.
Download the Device Specific Code
Once
we have the Lineage OS source code, we still need to download some
specific files, applications, and kernel configurations for your device.
This can be done trough a special bash file that contains some useful
scripts. To include this scripts in your terminal, type:
source build/envsetup.sh
At this point, we can start the download trough the utility "breakfast."
breakfast |codename|
Where |codename| is the codename of your device. For example, since I'm compiling for Galaxy S5, I will type breakfast klte.
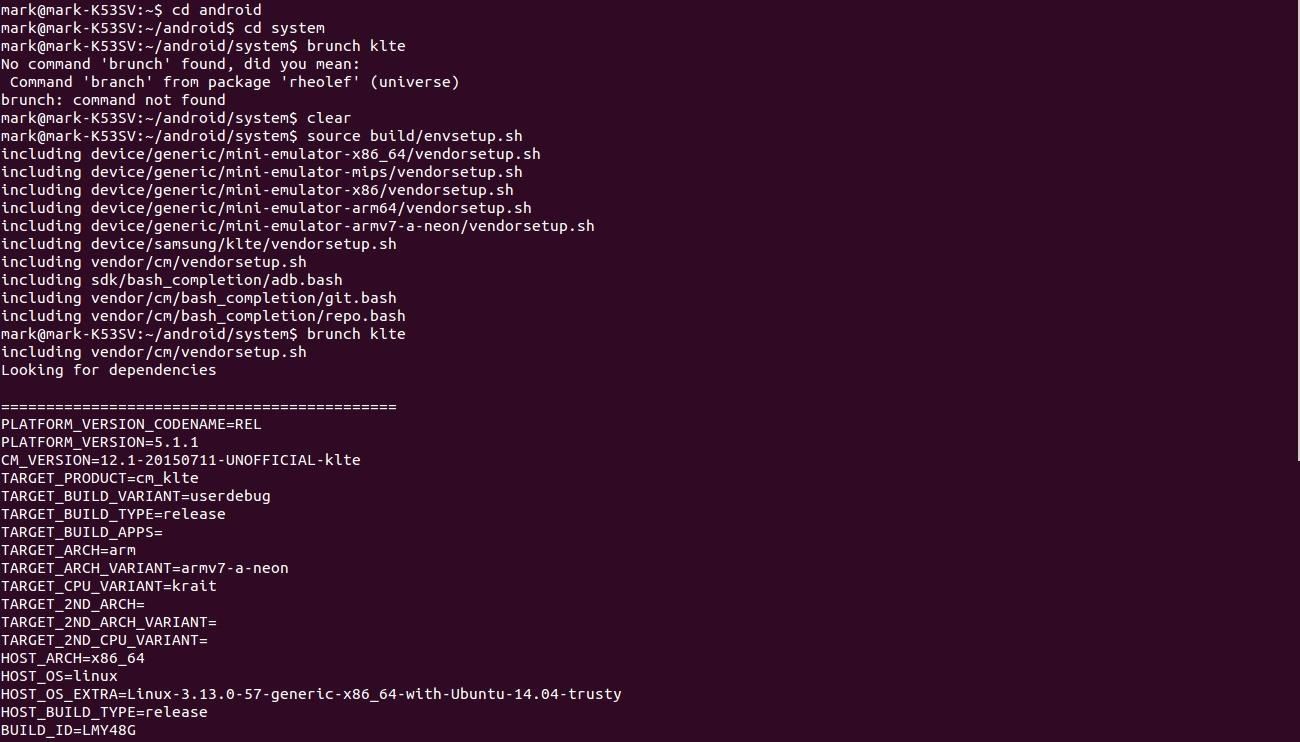
If the download complains about "vendor makefiles," skip this step, do the next one, and retry this one.
A download should now start, but don't worry, it will take far less time than the first repo sync.
Get Proprietary Specific Files
In order to compile the ROM correctly, you will need specific files from your vendor, too. This can be accomplished in two ways:
- By connecting the computer via USB cable, moving into the ~/android/system/device/VENDOR/CODENAME folder (via "cd"), and then running ./extract-files.sh. You should see that the utility ADB will pull out some files from your phone that will be needed for the building. Even though it is more straightforward than the other option, it gave me some problems related to the "TimeService.apk."
- [Recommended] By cloning the relative vendor folder from the "TheMuppets" GitHub page, which hosts proprietary files for each Android device. The download will get all the files for all the devices of one vendor. Don't worry, you can simply delete all of them except the ones you need after the download. They do this in case you had to compile for multiple devices.
In order to do this, "cd" to ~/android/system/device/VENDOR/CODENAME and then:
~/bin/repo init -u https
://github.com/TheMuppets/proprietary_vendor_VENDOR.git
-b cm-12.1
://github.com/TheMuppets/proprietary_vendor_VENDOR.git
-b cm-12.1
Make sure you choose the right branch. For example, for my Samsung Galaxy S5, I will have to use "https ://github.com/TheMuppets/proprietary_vendor_samsung.git" and the folder is "/android/system/device/samsung/klte."
Then, repo sync as before and overwrite the files in the folder ~/android/system/device/VENDOR/CODENAME
with the ones with the same names from the cloned folder. Then, you can
delete all the other ones for other devices if you don't need them.
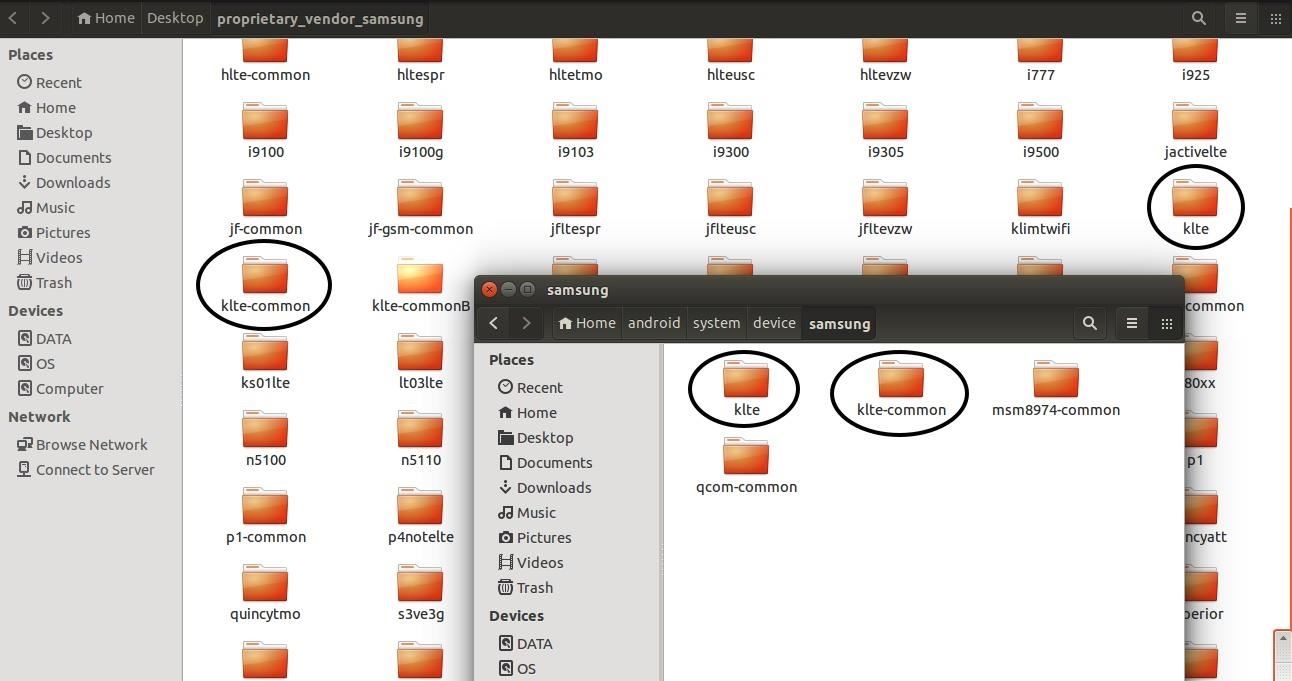
For example, in /android/system/device/samsung/klte,
I had two folders "klte" and "klte-common," which were also in the
folder cloned from GitHub, so I replaced them with the ones found in
TheMuppets repository.
Configuring the Kernel & Adding Features
Note: if you are not interested in editing the kernel configuration, you can skip this step and start compiling the ROM.
Here we are. The part that took me forever to figure out. It's actually easy, but tricky. Follow me and you won't get lost.
As you know, to compile source code on Linux, the main tools come from the GNU project. The main utility is called "make," which is "a tool which controls the generation of executables and other non-source files of a program from the program's source files."
Since
a source code can be very chaotic and should be modified only by
someone who has been working on it and knows every detail, "make
gets its knowledge of how to build your program from a file called the
makefile, which lists each of the non-source files and how to compute it
from other files. When you write a program, you should write a makefile
for it, so that it is possible to use Make to build and install the
program."
This is true for every source code you want co
compile. However, when compiling a kernel, we must be aware of another
type of configuration that gets involved. We must specify what features
should be built into the kernel. The Linux kernel configuration is
usually found in the kernel source in the hidden file ".config."
Lineage OS is organized in a way that it has a folder which contains the files to
build the kernel while the other folders are all dependencies for the
system and the interface of the ROM. The folder which contains the
kernel files is at ~/android/system/kernel/VENDOR/CODENAME/ (in my case /samsung/klte).
However, if we enter that directory and select "show hidden files,"
there still is no .config file! So how does "make" get the configuration
of the kernel? And how can we add features to it?
Actually, it is a good thing, let me explain this:
KLTE,
in my case, and CODENAME in any other case, is just the name of the
device. Clearly, there must be some differences between users of
different countries that use different communication protocols,
providers, services servers, etc. And most important of all, Android
uses ARM architecture, so we need special rules for that, too.
That's
why there is no .config file. The differences would be too big to use
only one configuration file. There are in fact many of them, in the
folder ~/android/system/kernel/VENDOR/CODENAME/arch/arm/configs.
However, these files are not called ".config," instead they are
organized by type, and all end with "_defconfig." Defconfig files are
really just a renamed .config file, and the name is just a convention
from the command used to generate .config files from them. Let me
elaborate.
To edit a .config file, the GNU project created a "make" utility just for that: "menuconfig." This utility must be launched from the main kernel folder (.../kernel/VENDOR/CODENAME)
and is used to edit a .config file in the same folder based on the
surrounding configuration files, the scopes of which is out of the aim
of this guide.
So we need to have a .config in the kernel folder
in order to be able to edit it, and the right one to use is among all
those defconfig files we found. Which is the right one to pick up?
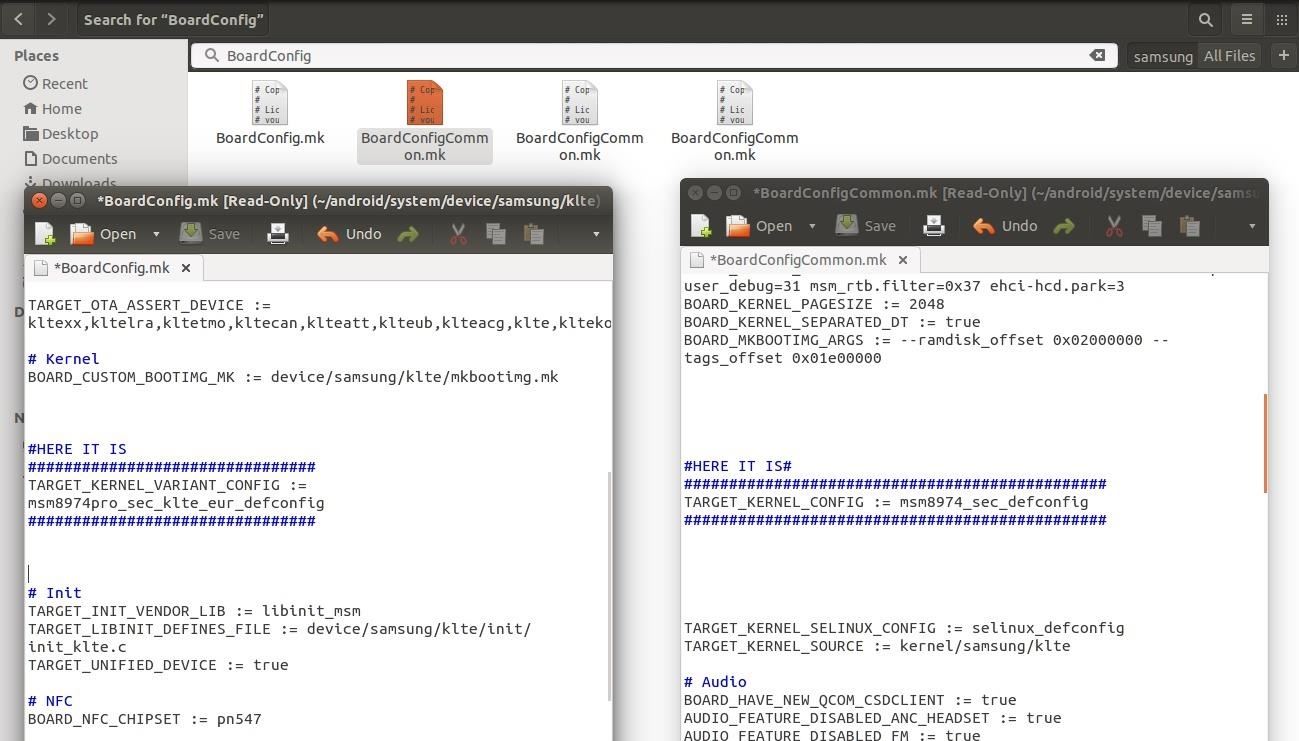
Following the instruction from the CyanogenMod Wiki: "The
kernel configuration file used during the build process is referenced
in TARGET_KERNEL_CONFIG variable in
device/vendor-name/device-name/BoardConfig.mk [OR!
device/vendor-name/device-name/BoardConfigCommon.mk]. It generally
points to
kernel/vendor-name/kernel-name/arch/arm/configs/cyanogenmod_device-name_deconfig."
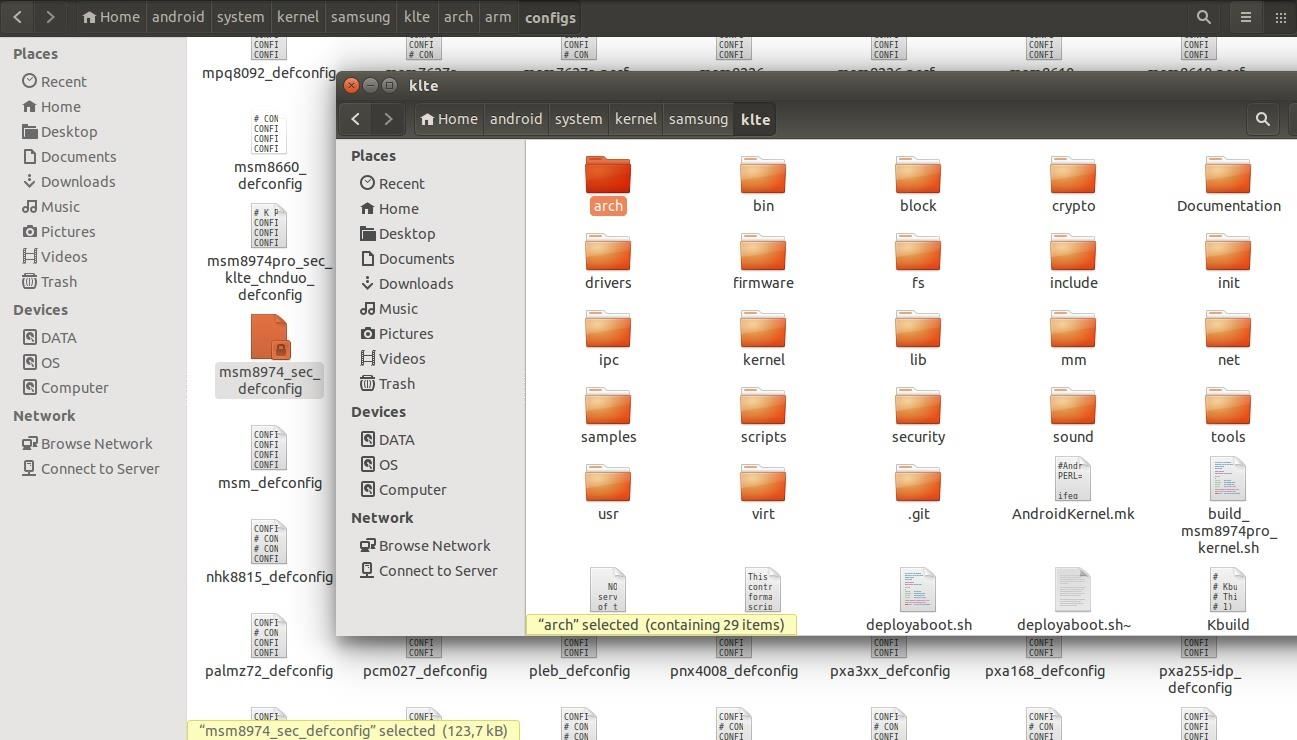
In my case, I found four different folders under ~/android/system/device/VENDOR/.
In order to find the right defconfig file, you must find the
"TARGET_KERNEL_CONFIG" value in a file which name starts with
"BoardConfig." For simplicity's sake, you can use the search bar from
the ~/android/system/device/VENDOR/ to find out how many
"BoardConfig" files are there and inspect them to find out the value of
"TARGET_KERNEL_CONFIG": that will be the name of the right defconfig
file to use. Make sure you also find the value of
"TARGET_KERNEL_VARIANT_CONFIG," as you may have to use it. I found the
first one in /samsung/klte-common/BoardConfigCommon.mk and the second in /samsung/klte/BoardConfig.mk, but things might be different in your case.
Anyway, at this point you can't just take the defconfig
file, rename it, and place in the kernel folder, otherwise you would be
missing important features. In order to generate the .config file, cd
into ~/android/system/kernel/VENDOR/CODENAME/ and run:
make ARCH=arm YOURDEFCONFIG VARIANT_DEFCONFIG=YOURVARIANTDEFCONFIG SELINUX_DEFCONFIG=selinux_defconfig
Where
YOURDEFCONFIG is the name of the file you found as value of
TARGET_KERNEL_CONFIG, and YOURVARIANTDEFCONFIG is
TARGET_KERNEL_VARIANT_CONFIG. For example, for me it is:
make ARCH=arm msm8974_sec_defconfig VARIANT_DEFCONFIG=msm8974pro_sec_klte_eur_defconfig SELINUX_DEFCONFIG=selinux_defconfig
You
might not have to use a variant defconfig, so if you can't find it as a
variable in the BoardConfig files, try not to include it in the
command.
At this point, we have our .config file which has just been created in ~/android/system/kernel/VENDOR/CODENAME/, so we can proceed with the kernel configuration editing by running:
make ARCH=arm menuconfig
The
"curses" GUI will open. Usually, you should never edit a kernel
configuration if you don't know what to do. You can enter menus with
Navigate trough "Networking Support" -> "Wireless" and include these:
[ * ] Common routines for IEEE802.11 drivers
[ * ] Generic IEEE 802.11 Networking Stack (mac80211)
[ * ] Generic IEEE 802.11 Networking Stack (mac80211)
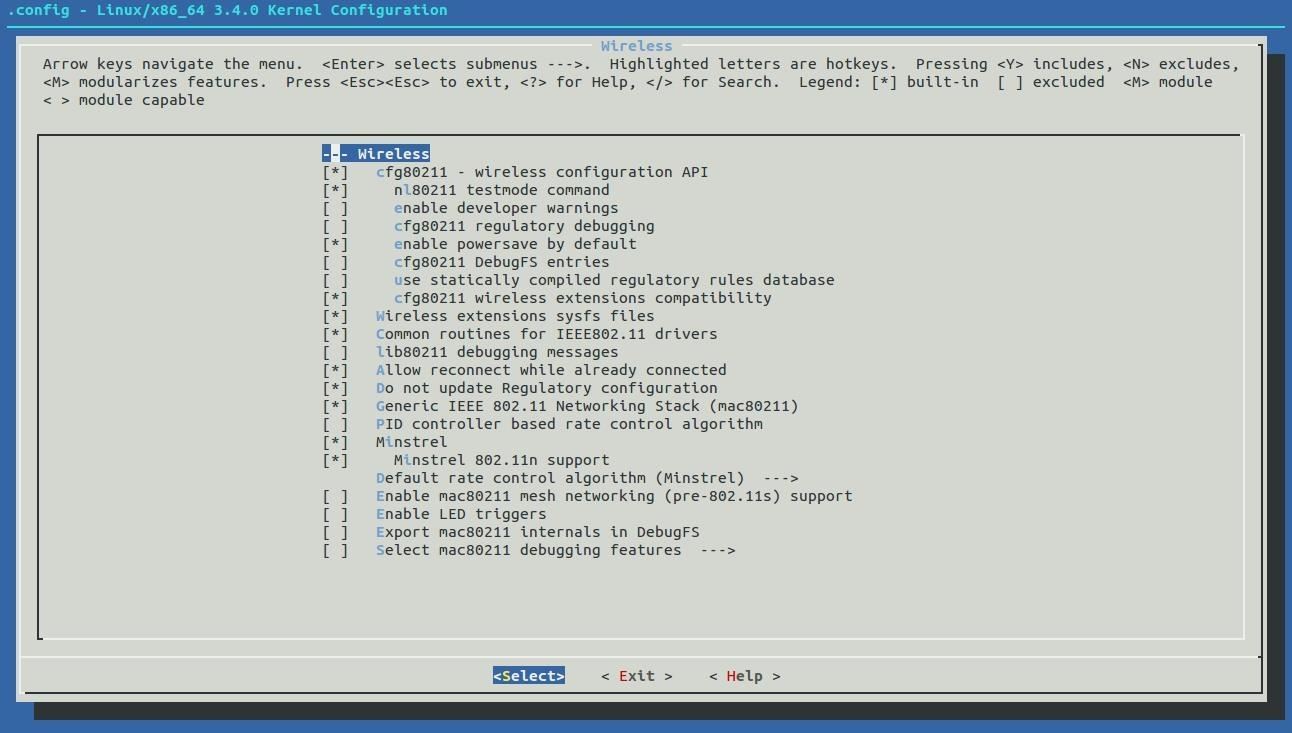
Then
using "Exit," navigate back to the main menu and enter "Device Drivers"
-> "Network device support" -> "Wireless LAN," and include:
[ * ] Realtek 8187 and 8187B USB support
Then exit and save the configuration.
A
message will tell you that the new configuration has been written to
the file ".config." All you have to do now is replace the old defconfig
file with this new one. So back up the defconfig in /arch/arm/configs before overwriting it and then:
cp /arch/arm/configs/YOURDEFCONFIG /arch/arm/configs/BACKUP
cp .config /arch/arm/configs/YOURDEFCONFIG
For example, for me it is:
cp .config /arch/arm/configs/msm8974_sec_defconfig
If you first want to try with something easier, try configuring the kernel to enable the generation of the /proc/config.gz file.
During
the compilation, the scripts will do basically the same thing that
we've done in the first part, generating a .config file from the
specified defconfig one, but this time the temporary used .config file
will be created in a folder similar to the kernel one, found at /home/android/system/out/target/product/CODENAME/obj/KERNEL_OBJ.
We can finally proceed with the building.
Compile the Kernel Source
Go back to the /android/system folder by running "croot."
Give some cache space for the build:
Add to .bashrc
export USE_CCACHE=1
export USE_CCACHE=1
Then run:
prebuilts/misc/linux-x86/ccache/ccache -M 50G
prebuilts/misc/linux-x86/ccache/ccache -M 50G
This will help speed up consequential builds.
And finally:
brunch CODENAME
In my case brunch klte.
This
will start compiling the source code. The compilation can take up to 2
hours or more, but if you recompile it again, it will speed up to 30
minutes or even less. If you get any error, Google them, and the XDA
forum probably has an answer.
At the end, you should see a blue
line telling you that a .zip file has been created. That, my dear Null
Byters, is the ROM that you can flash as explained above, just like it
was an official version of CyanogenMod. And if anything breaks up, you
now know how to restore from backup or flash a working version of
CyanogenMod.

Final segment of the compilation. Notice the blue line telling the location of the just created .zip file that can be flashed on your device. Also, notice the very last line which indicates that the compilation took exactly 7 minutes and 6 seconds: it is because I've already compiled this kernel several times. This is the result of using caching.
References
- CyanogenMod Wiki - Build Cyanogenmod for KLTE
- CyanogenMod Wiki - Integrated Kernel Building
- XDA Forum - Convert Your Nexus into KaliPwn Phone
- XDA Forum - Use Aircrack-ng on Android Phone Using Wireless USB Adapter
- XDA University - Getting Started: Building a Kernel from Source
- XDA University - Adding Features to Your Kernel
Demonstration
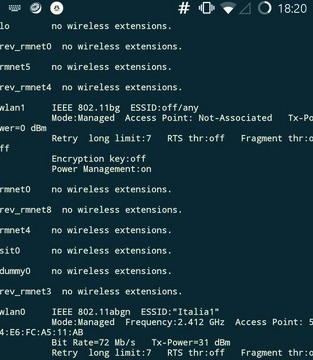
If all went fine, you should be able to use the wireless adapter in a chrooted Linux environment at this point.
Start
Linux Deploy, VNC into Kali, and run iwconfig. If you are able to see
"wlan1," very well, mission accomplished! At this point, you can act as
if you were using your computer:
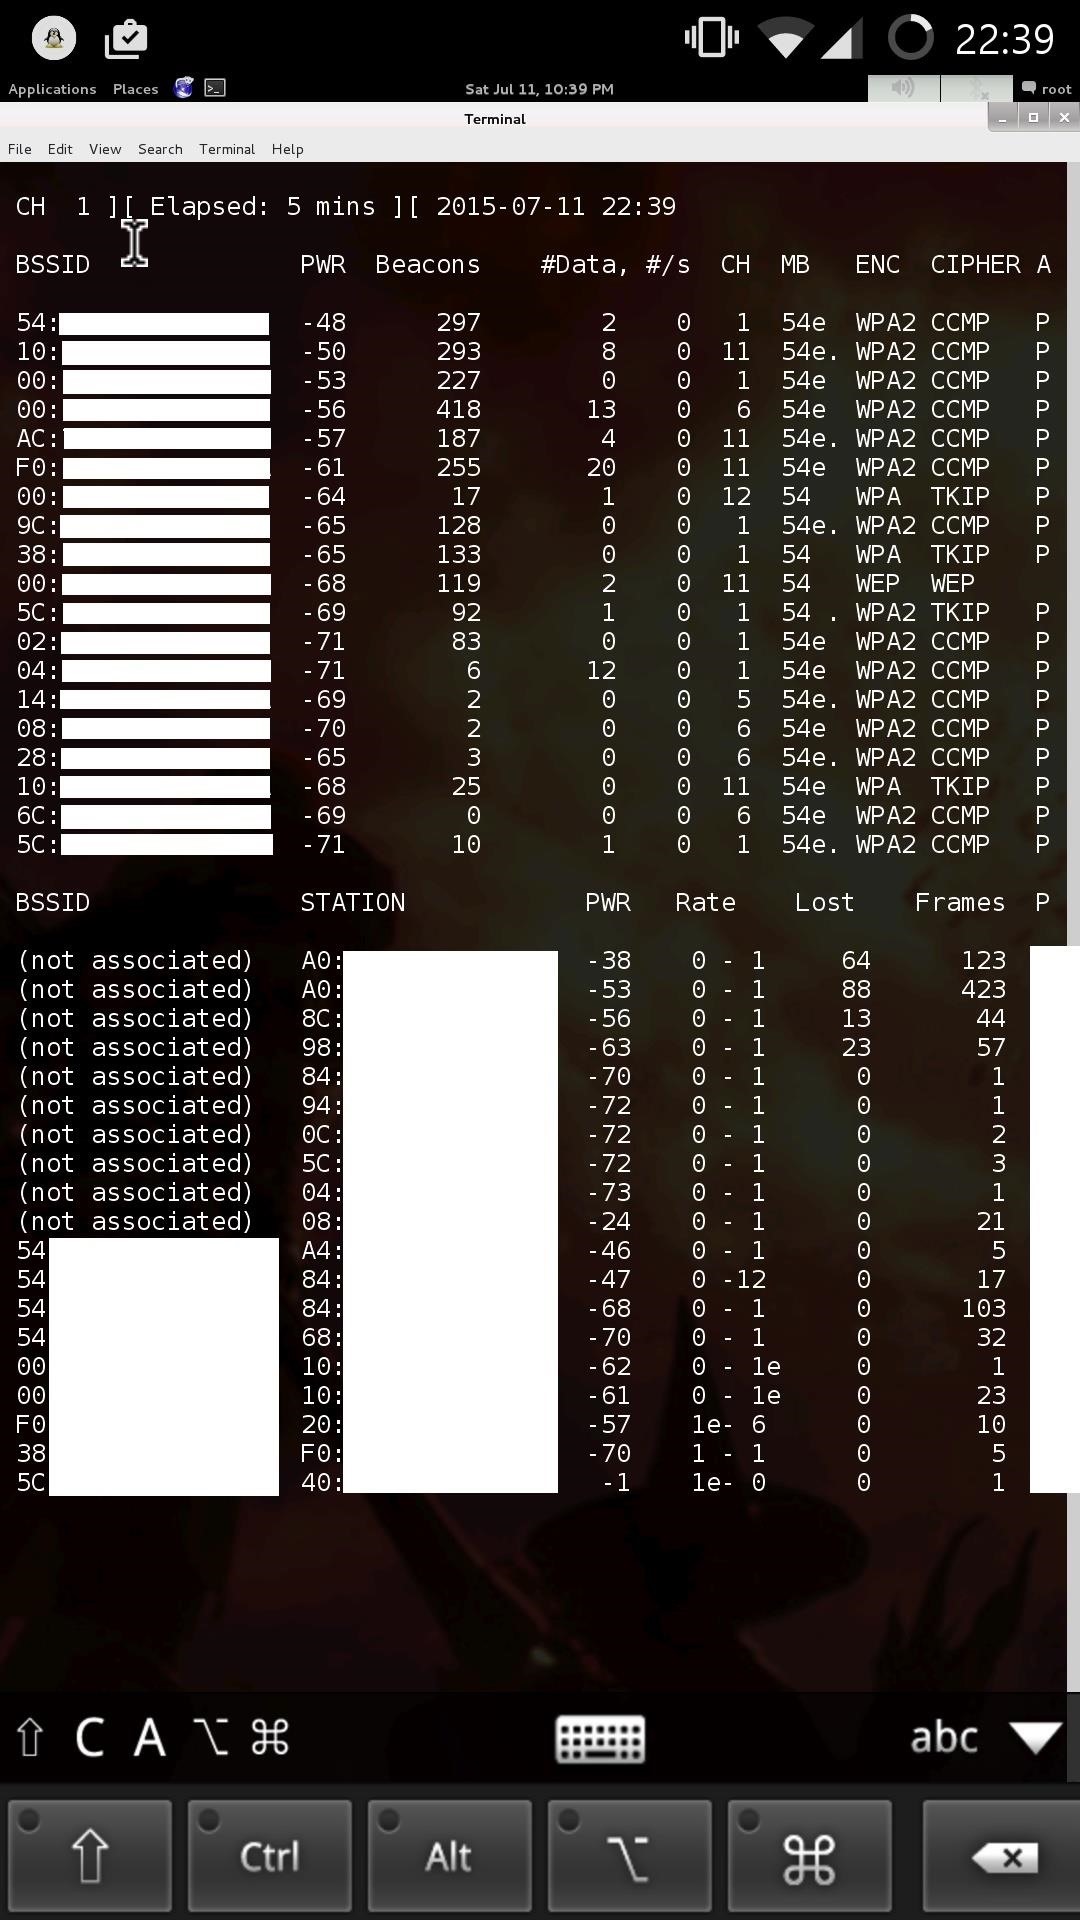
airmon-ng start wlan1
airodump-ng wlan1mon
airodump-ng wlan1mon
Make
sure you first installed Aircrack-ng via apt-get. To get iwconfig
utility, install the package "wireless-tools." You should also install
"usbutils" and "ethtools."
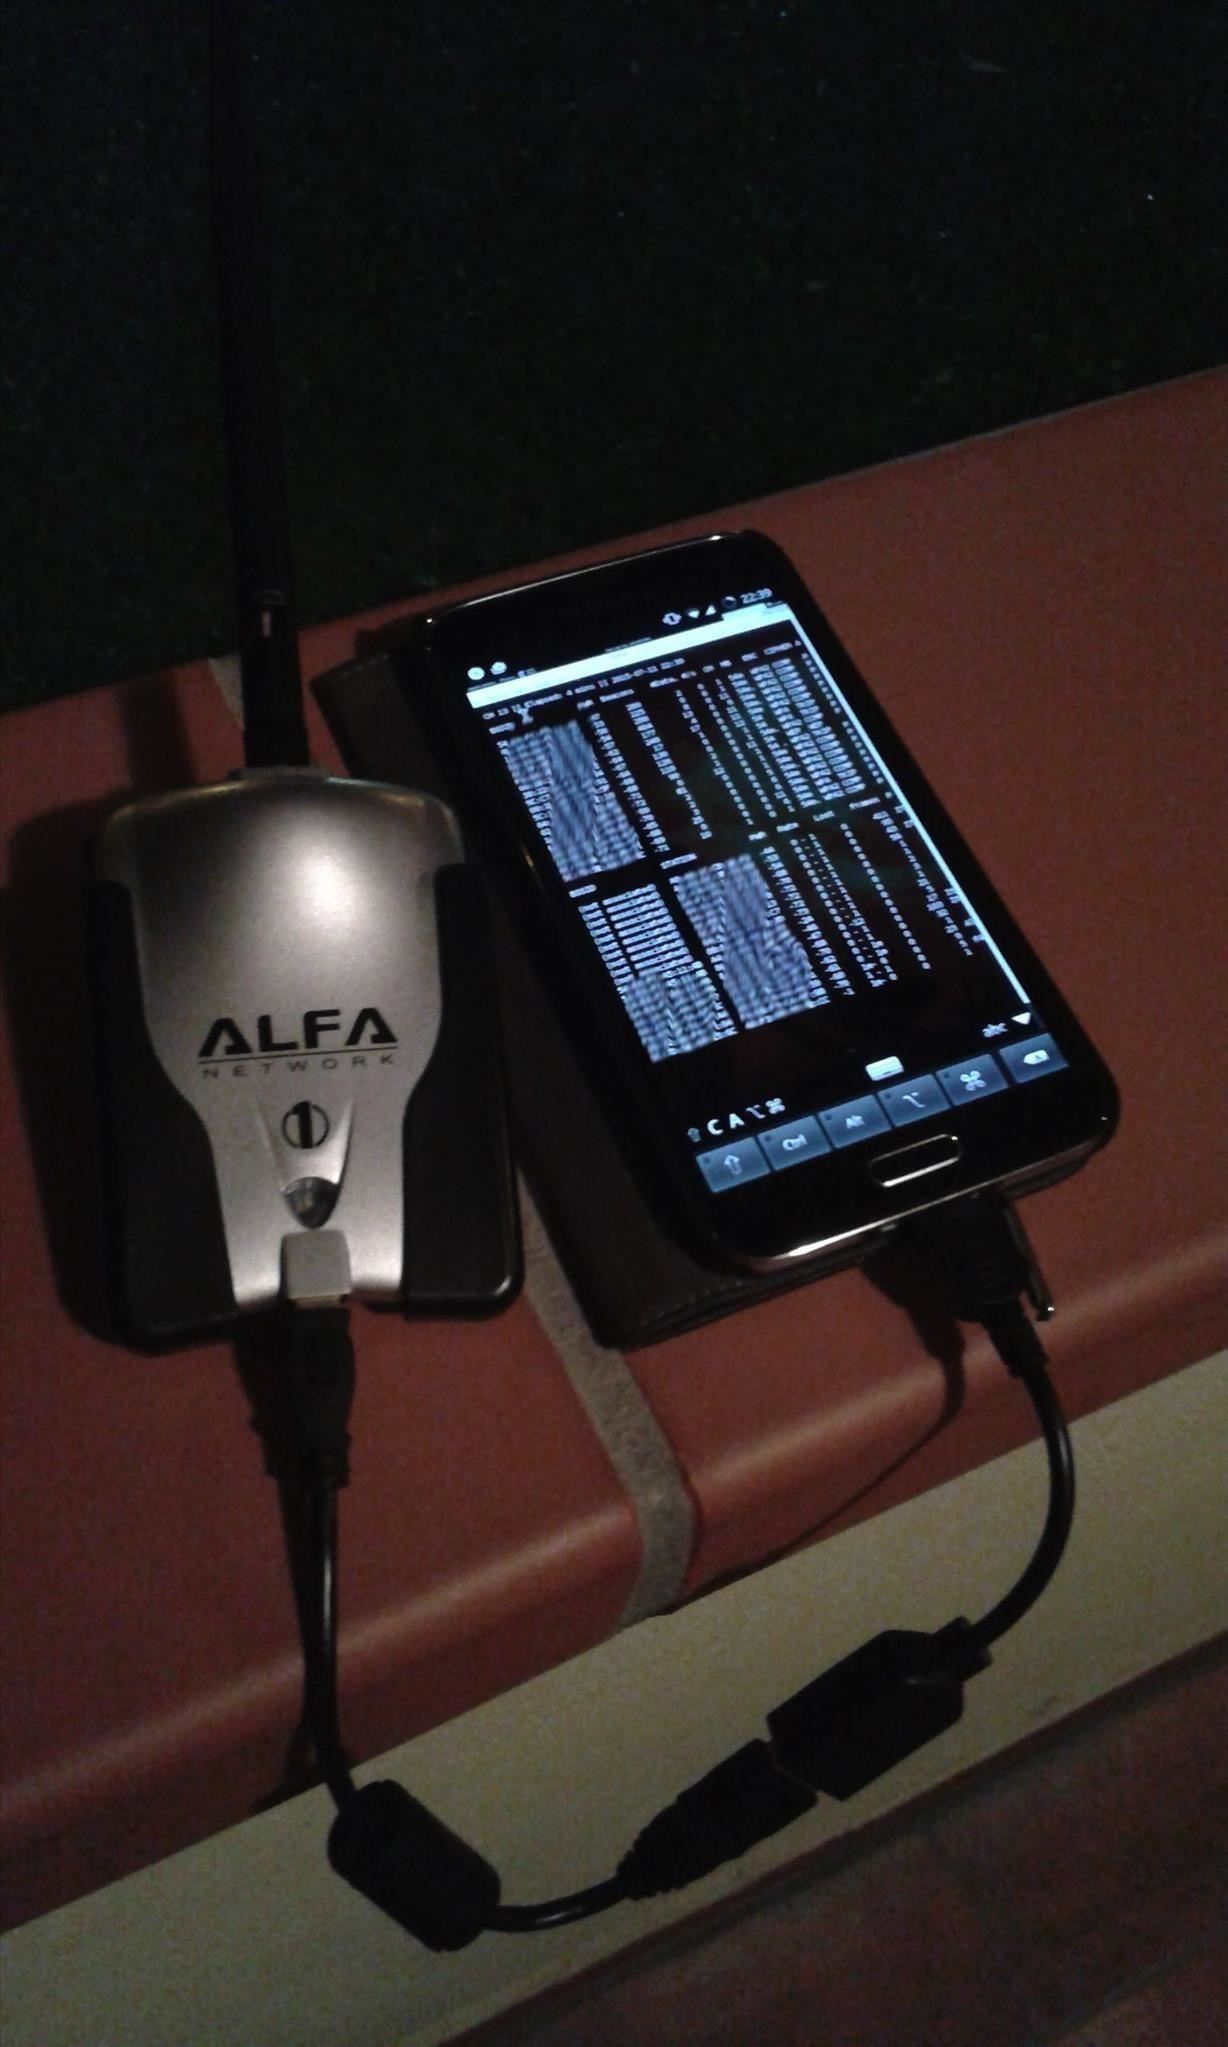
Wowee :o
Here are my reactions as soon as I found out this worked:

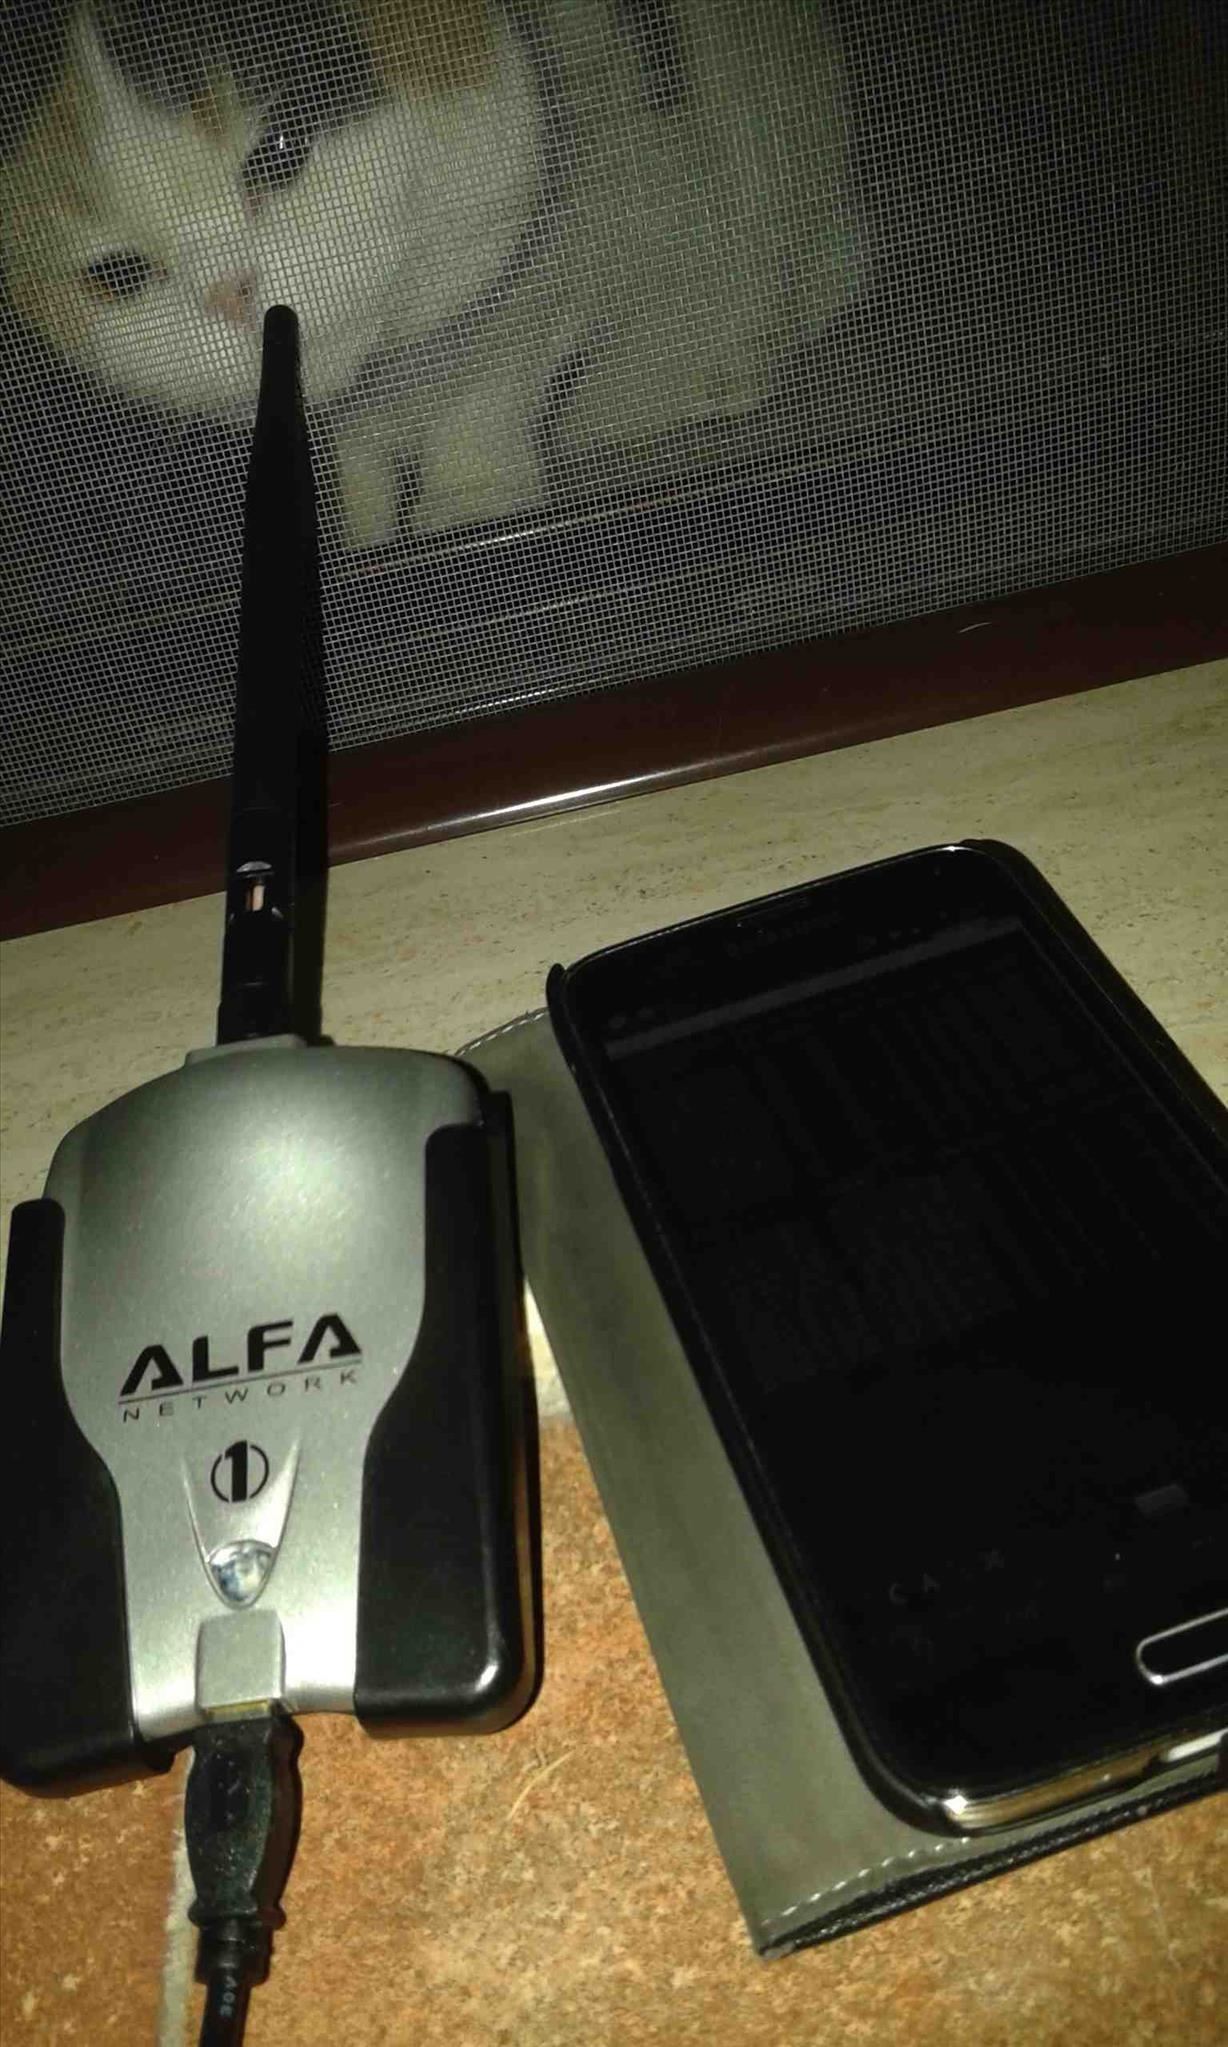
There results were quite impressive: the stock wireless card
has found 243 APs in approximately 800 meters, while the Alfa adapter
found 373, with an improvement of the 50%. I can conclude it was worth
the try.
Extra:
Even though Linux Deploy
does not support Android's GPS, the combination of the tools Kismet,
Bluenmea, Gpsd, and GisKismet may also be used for wardriving or local
area mapping, passing the GPS data with the app Bluenmea trough TCP to
Gpsd.
Conclusion
Walltext again, sorry people, I can't hold myself. I want everything to be as clear as possible. It's been an amazing journey for me to make this work (thanks 43 33 for supporting me!), and the reaction I had when it did was pretty hilarious. I gotta say I also had fun trying to figure out every little detail left over by the other guides online. This one is basically a puzzle of all the other guides I found online, and I tried to explain it as best as I could.As always, please report if you find any error in the guide. If you have any doubt before starting or if something is not working, don't hesitate to ask in the comment section, it will be a pleasure answering for me.
I'd like to take this opportunity to applaud three awesome communities here: Null Byte, first of all home and kickstart, XDA developers forum for their very detailed comment sections (I was able to solve every error just by looking at them), and finally, the community developing CyanogenMod, which is doing an appreciable job. GG to everybody.
Keep rocking, Null Byters. Hope you have learnt something new today and had a nice reading.


Post A Comment:
0 comments: